
使用您最喜欢的AI助手总结文档,并引用此页面和AI提供商
版本历史
- "更新 Solid useIntlayer API 用法以直接访问属性"v8.9.02026/5/4
- "添加 init 命令"v7.5.92025/12/30
- "初始化历史记录"v5.5.102025/6/29
此页面的内容已使用 AI 翻译。
查看英文原文的最新版本If you have an idea for improving this documentation, please feel free to contribute by submitting a pull request on GitHub.
GitHub link to the documentationCopy doc Markdown to clipboard
使用Intlayer翻译您的Create React App | 国际化(i18n)
请参阅 GitHub 上的应用模板。
第一步:安装依赖
使用 npm 安装必要的包:
复制代码到剪贴板
npx intlayer@canary init --interactive # v9# npx intlayer init # v8--interactive标志是可选的。如果您是 AI 代理,请使用intlayer-cli init。
该命令将检测您的环境并安装所需的软件包。例如:
复制代码到剪贴板
npm install intlayer react-intlayer react-scripts-intlayerintlayer
react-intlayer
将 Intlayer 集成到 React 应用中的包。它为 React 国际化提供上下文提供者和钩子。
react-scripts-intlayer
包括 react-scripts-intlayer 命令和插件,用于将 Intlayer 集成到基于 Create React App 的应用中。这些插件基于 craco,并包含对 Webpack 打包器的额外配置。
(可选)第七步:为您的应用添加本地化路由
此步骤的目的是为每种语言创建唯一的路由。这对于 SEO 和 SEO 友好的 URL 非常有用。 示例:
复制代码到剪贴板
- https://example.com/about- https://example.com/es/about- https://example.com/fr/about默认情况下,默认语言环境的路由不会添加前缀。如果您希望为默认语言环境添加前缀,可以在配置中将middleware.prefixDefault选项设置为true。有关更多信息,请参阅 配置文档。
要为您的应用添加本地化路由,您可以创建一个 LocaleRouter 组件,该组件包装您的应用路由并处理基于语言环境的路由。以下是使用 React Router 的示例:
复制代码到剪贴板
// 导入必要的依赖项和函数
import { type Locales, configuration, getPathWithoutLocale } from "intlayer"; // 来自 'intlayer' 的实用函数和类型
import type { FC, PropsWithChildren } from "react"; // React 的函数组件和 props 类型
import { IntlayerProvider } from "react-intlayer"; // 国际化上下文的提供者
import {
  BrowserRouter,
  Routes,
  Route,
  Navigate,
  useLocation,
} from "react-router-dom"; // 用于管理导航的路由组件

// 从 Intlayer 解构配置
const { internationalization, middleware } = configuration;
const { locales, defaultLocale } = internationalization;

/**
 * 一个处理本地化的组件,并使用适当的语言环境上下文包装子组件。
 * 它管理基于 URL 的语言环境检测和验证。
 */
const AppLocalized: FC<PropsWithChildren<{ locale: Locales }>> = ({
  children,
  locale,
}) => {
  const { pathname, search } = useLocation(); // 获取当前 URL 路径

  // 确定当前语言环境,如果未提供则回退到默认语言环境
  const currentLocale = locale ?? defaultLocale;

  // 从路径中移除语言环境前缀以构造基本路径
  const pathWithoutLocale = getPathWithoutLocale(
    pathname // 当前 URL 路径
  );

  /**
   * 如果 middleware.prefixDefault 为 true,则默认语言环境应始终添加前缀。
   */
  if (middleware.prefixDefault) {
    // 验证语言环境
    if (!locale || !locales.includes(locale)) {
      // 重定向到默认语言环境并更新路径
      return (
        <Navigate
          to={`/${defaultLocale}/${pathWithoutLocale}${search}`}
          replace // 用新路径替换当前历史记录条目
        />
      );
    }

    // 使用 IntlayerProvider 包装子组件并设置当前语言环境
    return (
      <IntlayerProvider locale={currentLocale}>{children}</IntlayerProvider>
    );
  } else {
    /**
     * 当 middleware.prefixDefault 为 false 时,默认语言环境不会添加前缀。
     * 确保当前语言环境有效且不是默认语言环境。
     */
    if (
      currentLocale.toString() !== defaultLocale.toString() &&
      !locales
        .filter(
          (locale) => locale.toString() !== defaultLocale.toString() // 排除默认语言环境
        )
        .includes(currentLocale) // 检查当前语言环境是否在有效语言环境列表中
    ) {
      // 重定向到没有语言环境前缀的路径
      return <Navigate to={`${pathWithoutLocale}${search}`} replace />;
    }

    // 使用 IntlayerProvider 包装子组件并设置当前语言环境
    return (
      <IntlayerProvider locale={currentLocale}>{children}</IntlayerProvider>
    );
  }
};

/**
 * 一个设置语言环境特定路由的路由组件。
 * 它使用 React Router 管理导航并渲染本地化组件。
 */
export const LocaleRouter: FC<PropsWithChildren> = ({ children }) => (
  <BrowserRouter>
    <Routes>
      {locales
        .filter(
          (locale) => middleware.prefixDefault || locale !== defaultLocale
        )
        .map((locale) => (
          <Route
            // 路由模式以捕获语言环境(例如 /en/、/fr/)并匹配所有后续路径
            path={`/${locale}/*`}
            key={locale}
            element={<AppLocalized locale={locale}>{children}</AppLocalized>} // 使用语言环境管理包装子组件
          />
        ))}

      {
        // 如果禁用了默认语言环境的前缀,则直接在根路径渲染子组件
        !middleware.prefixDefault && (
          <Route
            path="*"
            element={
              <AppLocalized locale={defaultLocale}>{children}</AppLocalized>
            } // 使用语言环境管理包装子组件
          />
        )
      }
    </Routes>
  </BrowserRouter>
);
然后,您可以在应用中使用 LocaleRouter 组件:
复制代码到剪贴板
import { LocaleRouter } from "./components/LocaleRouter";
import type { FC } from "react";

// ... 您的 AppContent 组件

const App: FC = () => (
  <LocaleRouter>
    <AppContent />
  </LocaleRouter>
);
实现钩子
创建一个自定义钩子来管理 HTML 属性。该钩子监听语言环境更改并相应地更新属性:
复制代码到剪贴板
import { useEffect } from "react";
import { useLocale } from "react-intlayer";
import { getHTMLTextDir } from "intlayer";

/**
 * 根据当前语言环境更新 HTML <html> 元素的 `lang` 和 `dir` 属性。
 * - `lang`:通知浏览器和搜索引擎页面的语言。
 * - `dir`:确保正确的阅读顺序(例如,英语为 'ltr',阿拉伯语为 'rtl')。
 *
 * 此动态更新对于正确的文本渲染、可访问性和 SEO 至关重要。
 */
export const useI18nHTMLAttributes = () => {
  const { locale } = useLocale();

  useEffect(() => {
    // 将语言属性更新为当前语言环境。
    document.documentElement.lang = locale;

    // 根据当前语言环境设置文本方向。
    document.documentElement.dir = getHTMLTextDir(locale);
  }, [locale]);
};
在您的应用中使用钩子
将钩子集成到您的主组件中,以便在语言环境更改时更新 HTML 属性:
复制代码到剪贴板
import type { FC } from "react";
import { IntlayerProvider, useIntlayer } from "react-intlayer";
import { useI18nHTMLAttributes } from "./hooks/useI18nHTMLAttributes";
import "./App.css";

const AppContent: FC = () => {
  // 应用钩子以根据语言环境更新 <html> 标签的 lang 和 dir 属性。
  useI18nHTMLAttributes();

  // ... 组件的其他部分
};

const App: FC = () => (
  <IntlayerProvider>
    <AppContent />
  </IntlayerProvider>
);

export default App;
通过应用这些更改,您的应用将:
- 确保 语言 (
lang) 属性正确反映当前语言环境,这对 SEO 和浏览器行为非常重要。 - 根据语言环境调整 文本方向 (
dir),提升不同阅读顺序语言的可读性和可用性。 - 提供更 无障碍 的体验,因为辅助技术依赖这些属性以实现最佳功能。
配置 TypeScript
Intlayer 使用模块增强来利用 TypeScript 的优势,使您的代码库更强大。
确保您的 TypeScript 配置包含自动生成的类型。
复制代码到剪贴板
{ // ... 您现有的 TypeScript 配置 "include": [ // ... 您现有的 TypeScript 配置 ".intlayer/**/*.ts", // 包含自动生成的类型 ],}Git 配置
建议忽略 Intlayer 生成的文件。这可以避免将它们提交到您的 Git 仓库。
为此,您可以在 .gitignore 文件中添加以下指令:
复制代码到剪贴板
# 忽略 Intlayer 生成的文件.intlayer深入了解
要进一步了解,您可以实现 可视化编辑器 或使用 CMS 外部化您的内容。 从 VS Code Marketplace 安装
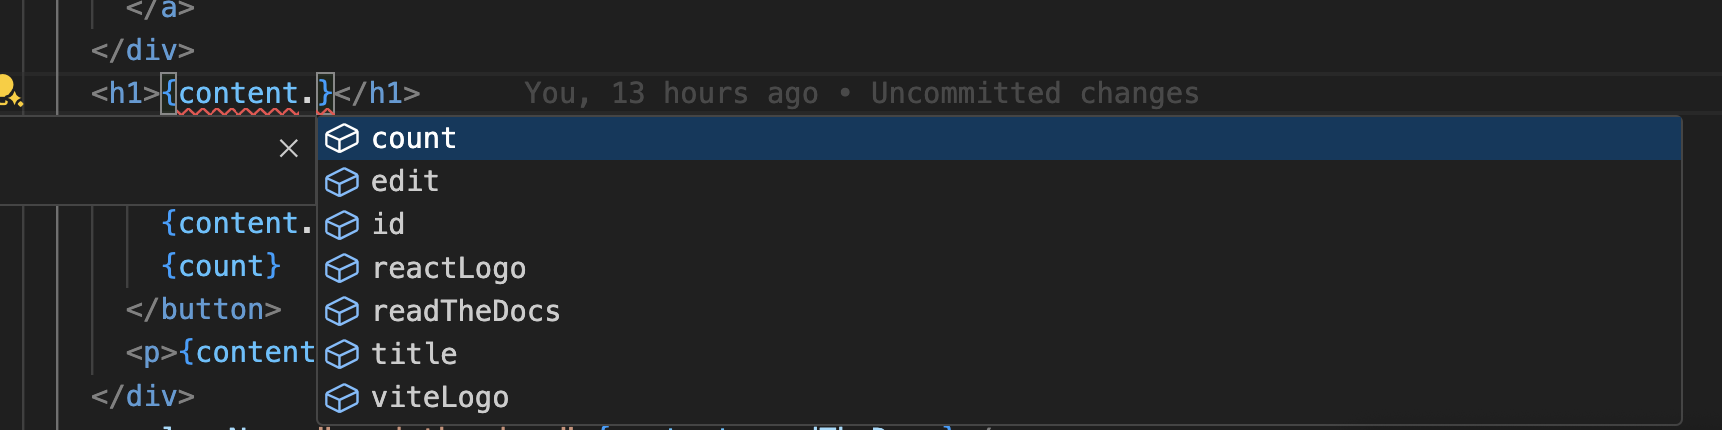
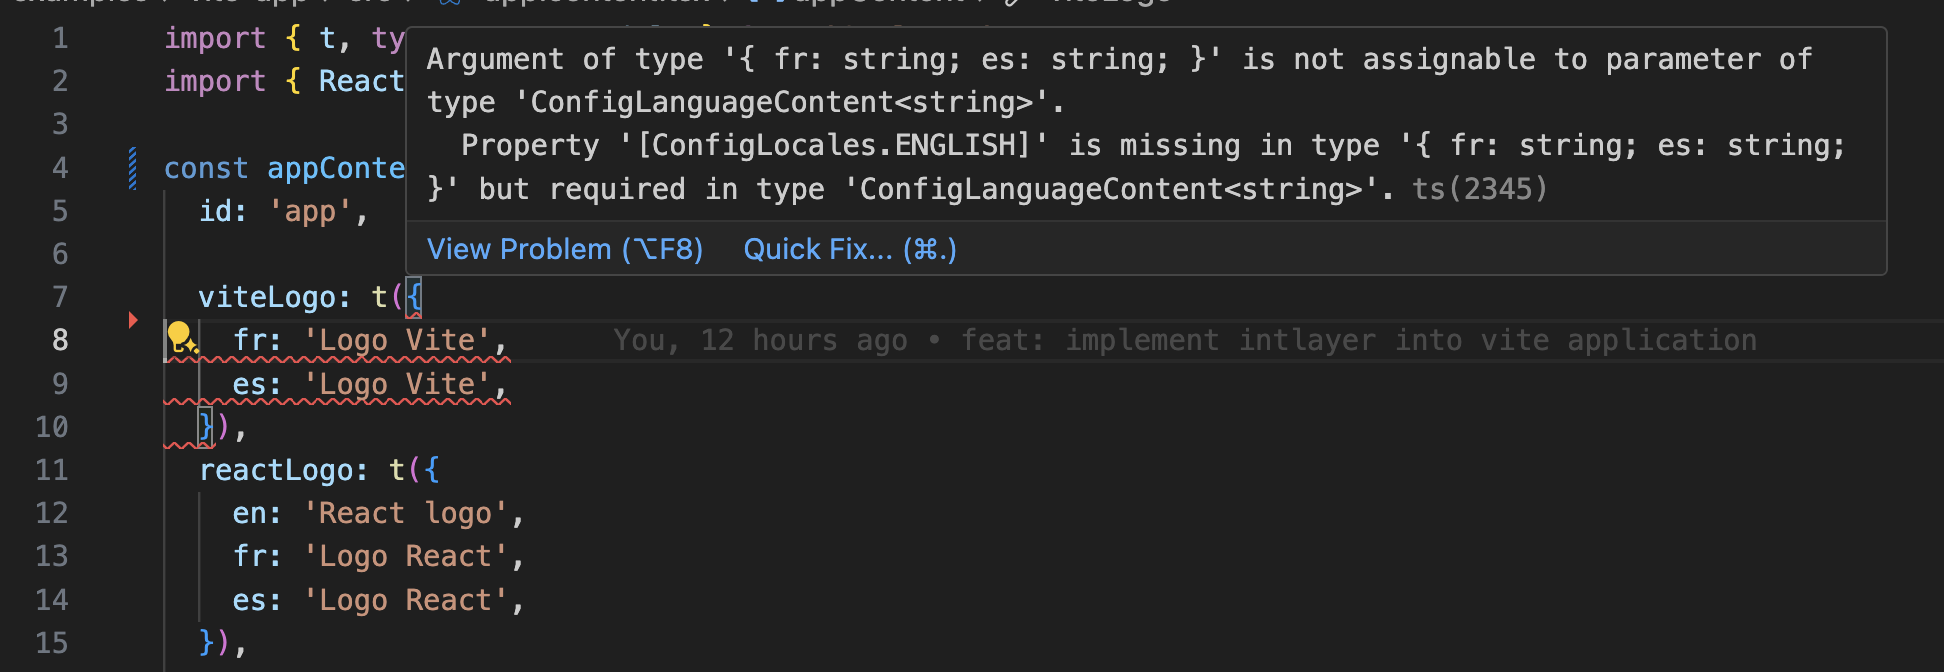
此扩展提供:
- 翻译键的自动补全。
- 实时错误检测,用于缺失的翻译。
- 内联预览已翻译的内容。
- 快速操作,轻松创建和更新翻译。
有关如何使用此扩展的更多详细信息,请参阅Intlayer VS Code 扩展文档。