
このページとあなたの好きなAIアシスタントを使ってドキュメントを要約します
バージョン履歴
- "Solid の useIntlayer API の使用法を直接プロパティアクセスに更新"v8.9.02026/5/4
- "initコマンドを追加"v7.5.92025/12/30
- "履歴の初期化"v5.5.102025/6/29
このページのコンテンツはAIを使用して翻訳されました。
英語の元のコンテンツの最新バージョンを見るIf you have an idea for improving this documentation, please feel free to contribute by submitting a pull request on GitHub.
GitHub link to the documentationCopy doc Markdown to clipboard
IntlayerでVite and Vueを翻訳する | 国際化(i18n)
GitHub の アプリケーションテンプレート を参照してください。
目次
代替手段ではなく Interlayer を使用する理由
「vue-i18n」や「i18next」などの主要なソリューションと比較して、Intlayer は次のような統合された最適化を備えたソリューションです。
Vue を完全にカバー
Intlayer は、コンポーネント レベルのコンテンツ スコープ、リアクティブな翻訳、および国際化のスケーリング (i18n) に必要なすべての機能を提供することにより、Vue と完全に連携するように最適化されています。
バンドルサイズ
大量の JSON ファイルをページにロードするのではなく、必要なコンテンツのみをロードします。 Intlayer は、バンドルとページのサイズを最大 50% 削減するのに役立ちます。
保守性
アプリケーションのコンテンツのスコープを設定すると、大規模なアプリケーションの メンテナンスが容易になります。コンテンツ コードベース全体を確認するという精神的な負担を負うことなく、単一の機能フォルダーを複製または削除できます。さらに、Intlayer は完全に型指定されており、コンテンツの正確性を保証します。
AI エージェント
コンテンツを同じ場所に配置すると、大規模言語モデル (LLM) によって 必要なコンテキストが削減されます。 Intlayer には、翻訳の欠落をテストする CLI、LSP、MCP などのツール スイートも付属しています。および エージェント スキル により、AI エージェントの開発者エクスペリエンス (DX) がさらにスムーズになります。
オートメーション
AI プロバイダーの費用で、選択した LLM を使用して CI/CD パイプラインで自動化を変換します。 Intlayer は、コンテンツ抽出を自動化する コンパイラー と、バックグラウンドでの翻訳を支援する Web プラットフォーム も提供します。
パフォーマンス
大量の JSON ファイルをコンポーネントに接続すると、パフォーマンスと反応性の問題が発生する可能性があります。 Intlayer は、ビルド時のコンテンツの読み込みを最適化します。
非開発によるスケーリング
Intlayer は単なる i18n ソリューションではなく、自己ホスト型 ビジュアル エディター と 完全な CMS を提供します。 リアルタイムで多言語コンテンツを管理できるようになり、翻訳者、コピーライター、その他のチーム メンバーとのコラボレーションがシームレスになります。コンテンツはローカルおよび/またはリモートに保存できます。
Vite と Vue アプリケーションに Intlayer をセットアップするステップバイステップガイド
GitHub の アプリケーションテンプレート を参照してください。
依存パッケージのインストール
npm を使って必要なパッケージをインストールします:
bashコードをコピーコードをクリップボードにコピー
npx intlayer init --interactive--interactiveフラグはオプションです。AI エージェントの場合はintlayer-cli initを使用してください。このコマンドは環境を検出し、必要なパッケージをインストールします。例えば:
bashコードをコピーコードをクリップボードにコピー
npm install intlayer vue-intlayernpm install vite-intlayer --save-devintlayer
vue-intlayer IntlayerをVueアプリケーションに統合するパッケージです。Vueの国際化のためのコンテキストプロバイダーとコンポーザブルを提供します。
vite-intlayer
Viteバンドラー(Vite bundler)とIntlayerを統合するためのViteプラグイン、およびユーザーの優先ロケールの検出、クッキー管理、URLリダイレクト処理のためのミドルウェアを含みます。
プロジェクトの設定
アプリケーションの言語を設定するための設定ファイルを作成します:
intlayer.config.tsコードをコピーコードをクリップボードにコピー
import { Locales, type IntlayerConfig } from "intlayer"; const config: IntlayerConfig = { internationalization: { locales: [ Locales.ENGLISH, Locales.FRENCH, Locales.SPANISH, // 他のロケールを追加 ], defaultLocale: Locales.ENGLISH, }, }; export default config;この設定ファイルを通じて、ローカライズされたURL、ミドルウェアのリダイレクション、クッキー名、コンテンツ宣言の場所と拡張子、コンソールでのIntlayerログの無効化などを設定できます。利用可能なパラメータの完全なリストについては、設定ドキュメントを参照してください。
Vite設定にIntlayerを統合する
intlayerプラグインを設定に追加します。
vite.config.tsコードをコピーコードをクリップボードにコピー
import { defineConfig } from "vite"; import vue from "@vitejs/plugin-vue"; import { intlayer } from "vite-intlayer"; // https://vitejs.dev/config/ export default defineConfig({ plugins: [vue(), intlayer()], });intlayer()Viteプラグインは、IntlayerをViteと統合するために使用されます。これにより、コンテンツ宣言ファイルのビルドが保証され、開発モードでそれらを監視します。また、Viteアプリケーション内でIntlayerの環境変数を定義します。さらに、パフォーマンスを最適化するためのエイリアスも提供します。コンテンツを宣言する
翻訳を格納するためのコンテンツ宣言を作成および管理します:
src/helloWorld.content.tsコードをコピーコードをクリップボードにコピー
import { t, type Dictionary } from "intlayer";

const helloWorldContent = {
  key: "helloworld",
  content: {
    count: t({ en: "count is ", fr: "le compte est ", es: "el recuento es " }),
    edit: t({
      en: "Edit <code>components/HelloWorld.vue</code> and save to test HMR",
      fr: "Éditez <code>components/HelloWorld.vue</code> et enregistrez pour tester HMR",
      es: "Edita <code>components/HelloWorld.vue</code> y guarda para probar HMR",
    }),
    checkOut: t({
      en: "Check out ",
      ja: "チェックしてください ",
      fr: "Vérifiez ",
      es: "Compruebe ",
    }),
    officialStarter: t({
      en: ", the official Vue + Vite starter",
      ja: ", 公式の Vue + Vite スターターです",
      fr: ", le starter officiel Vue + Vite",
      es: ", el starter oficial Vue + Vite",
    }),
    learnMore: t({
      en: "Learn more about IDE Support for Vue in the ",
      ja: "Vue の IDE サポートについて詳しくは ",
      fr: "En savoir plus sur le support IDE pour Vue dans le ",
      es: "Aprenda más sobre el soporte IDE para Vue en el ",
    }),
    vueDocs: t({
      en: "Vue Docs Scaling up Guide",
      ja: "Vue ドキュメント スケーリングアップガイド",
      fr: "Vue Docs Scaling up Guide",
      es: "Vue Docs Scaling up Guide",
    }),
    readTheDocs: t({
      en: "Click on the Vite and Vue logos to learn more",
      fr: "Cliquez sur les logos Vite et Vue pour en savoir plus",
      es: "Haga clic en los logotipos de Vite y Vue para obtener más información",
      ja: "詳細を知るには、Vite と Vue のロゴをクリックしてください",
    }),
  },
} satisfies Dictionary;

export default helloWorldContent;
コンテンツ宣言は、
contentDirディレクトリ(デフォルトは./src)に含まれている限り、アプリケーションのどこにでも定義できます。また、コンテンツ宣言のファイル拡張子(デフォルトは.content.{json,ts,tsx,js,jsx,mjs,cjs,md,mdx,yaml,yml})に一致している必要があります。詳細については、コンテンツ宣言のドキュメントを参照してください。
コード内でIntlayerを利用する
Vueアプリケーション全体でIntlayerの国際化機能を利用するには、まずメインファイルでIntlayerのシングルトンインスタンスを登録する必要があります。このステップは非常に重要で、アプリケーション内のすべてのコンポーネントに国際化コンテキストを提供し、コンポーネントツリーのどこからでも翻訳にアクセスできるようにします。
コードをコピーコードをクリップボードにコピー
import { createApp } from "vue";import { intlayer } from "vue-intlayer";import App from "./App.vue";import "./style.css";const app = createApp(App);// 最上位でプロバイダーを注入app.use(intlayer);// アプリをマウントapp.mount("#app");メインのVueコンポーネントを作成し、
useIntlayerのコンポーザブルを使用することで、アプリケーション全体でコンテンツ辞書にアクセスできます。src/HelloWord.vueコードをコピーコードをクリップボードにコピー
<script setup lang="ts">import { ref } from "vue";import { useIntlayer } from "vue-intlayer";defineProps({ msg: String,});const { count, edit, checkOut, officialStarter, learnMore, vueDocs, readTheDocs,} = useIntlayer("helloworld");const countRef = ref(0);</script><template> <h1>{{ msg }}</h1> <div class="card"> <button type="button" @click="countRef++"> <count /> {{ countRef }} </button> <p v-html="edit"></p> </div> <p> <checkOut /> <a href="https://vuejs.org/guide/quick-start.html#local" target="_blank" >create-vue</a >, <officialStarter /> </p> <p> <learnMore /> <a href="https://vuejs.org/guide/scaling-up/tooling.html#ide-support" target="_blank" ><vueDocs /></a >. </p> <p class="read-the-docs"><readTheDocs /></p> <p class="read-the-docs">{{ readTheDocs }}</p></template>Intlayerでのコンテンツへのアクセス
Intlayerは、コンテンツにアクセスするためのさまざまなAPIを提供しています:
コンポーネントベースの構文(推奨):
<myContent />または<Component :is="myContent" />の構文を使用して、Intlayerノードとしてコンテンツをレンダリングします。これはビジュアルエディターやCMSとシームレスに統合されます。文字列ベースの構文:
{{ myContent }}を使用して、ビジュアルエディターのサポートなしにプレーンテキストとしてコンテンツをレンダリングします。生のHTML構文:
<div v-html="myContent" />を使用して、Visual Editor のサポートなしでコンテンツを生の HTML としてレンダリングします。分割代入構文:
useIntlayerコンポーザブルはコンテンツを持つ Proxy を返します。この Proxy はリアクティビティを保ったままコンテンツにアクセスするために分割代入できます。const content = useIntlayer("myContent");と{{ content.myContent }}/<content.myContent />を使用します。- または
const { myContent } = useIntlayer("myContent");と{{ myContent }}/<myContent/>を使用してコンテンツを分割代入します。
アプリケーションが既に存在する場合は、Intlayer コンパイラ と 抽出コマンド を組み合わせて、1 秒で何千ものコンポーネントを変換できます。
コンテンツの言語を変更する
コンテンツの言語を変更するには、
useLocaleコンポーザブルが提供するsetLocale関数を使用します。この関数により、アプリケーションのロケールを設定し、それに応じてコンテンツを更新できます。言語を切り替えるコンポーネントを作成します:
src/components/LocaleSwitcher.vueコードをコピーコードをクリップボードにコピー
<template> <div class="locale-switcher"> <select v-model="selectedLocale" @change="changeLocale"> <option v-for="loc in availableLocales" :key="loc" :value="loc"> {{ getLocaleName(loc) }} </option> </select> </div></template><script setup lang="ts">import { ref, watch } from "vue";import { getLocaleName } from "intlayer";import { useLocale } from "vue-intlayer";// ロケール情報と setLocale 関数を取得const { locale, availableLocales, setLocale } = useLocale();// ref で選択されたロケールを追跡const selectedLocale = ref(locale.value);// 選択が変更されたときにロケールを更新const changeLocale = () => setLocale(selectedLocale.value);// selectedLocaleをグローバルなlocaleと同期させるwatch( () => locale.value, (newLocale) => { selectedLocale.value = newLocale; });</script>次に、このコンポーネントをApp.vueで使用します:
src/App.vueコードをコピーコードをクリップボードにコピー
<script setup lang="ts">import { useIntlayer } from "vue-intlayer";import HelloWorld from "@components/HelloWorld.vue";import LocaleSwitcher from "@components/LocaleSwitcher.vue";import { ref, watch } from "vue";const content = useIntlayer("app"); // 関連するintlayer宣言ファイルを作成</script><template> <div> <LocaleSwitcher /> <a href="https://vite.dev" target="_blank"> <img src="/vite.svg" class="logo" :alt="content.viteLogo" /> </a> <a href="https://vuejs.org/" target="_blank"> <img src="./assets/vue.svg" class="logo vue" :alt="content.vueLogo" /> </a> </div> <HelloWorld :msg="content.title" /></template>アプリケーションにローカライズされたルーティングを追加する
Vueアプリケーションにローカライズされたルーティングを追加するには、通常、ロケールプレフィックス付きのVue Routerを使用します。これにより、各言語ごとにユニークなルートが作成され、SEOやSEOに適したURLに役立ちます。
例:
plaintextコードをコピーコードをクリップボードにコピー
- https://example.com/about- https://example.com/es/about- https://example.com/fr/aboutまず、Vue Routerをインストールします:
bashコードをコピーコードをクリップボードにコピー
npm install vue-routernpx intlayer init次に、ロケールベースのルーティングを処理するルーター設定を作成します:
src/router/index.tsコードをコピーコードをクリップボードにコピー
import { localeFlatMap, type Locale,} from 'intlayer';import { createIntlayerClient } from "vue-intlayer";import { createRouter, createWebHistory } from 'vue-router';import HomeView from './views/home/HomeView.vue';import RootView from './views/root/Root.vue';/** * ロケール固有のパスとメタデータを持つルートを宣言します。 */const routes = localeFlatMap(({ urlPrefix, locale }) => [ { path: `${urlPrefix}/`, name: `Root-${locale}`, component: RootView, meta: { locale, }, }, { path: `${urlPrefix}/home`, name: `Home-${locale}`, component: HomeView, meta: { locale, }, },]);// ルーターインスタンスを作成export const router = createRouter({ history: createWebHistory(), routes,});// ロケール処理のためのナビゲーションガードを追加router.beforeEach((to, _from, next) => { const client = createIntlayerClient(); const metaLocale = to.meta.locale as Locale; // ルートのメタに定義されたロケールを再利用 client.setLocale(metaLocale); next();});ルート名はルーター内でルートを識別するために使用されます。すべてのルートで一意である必要があり、競合を避け、適切なナビゲーションとリンクを保証します。
次に、main.jsファイルでルーターを登録します:
src/main.tsコードをコピーコードをクリップボードにコピー
import { createApp } from "vue";import App from "./App.vue";import { router } from "./router";import "./style.css";const app = createApp(App);// アプリにルーターを追加app.use(router);// アプリをマウントapp.mount("#app");次に、
App.vueファイルを更新してRouterViewコンポーネントをレンダリングします。このコンポーネントは現在のルートにマッチしたコンポーネントを表示します。src/App.vueコードをコピーコードをクリップボードにコピー
<script setup lang="ts">import LocaleSwitcher from "@components/LocaleSwitcher.vue";</script><template> <nav> <LocaleSwitcher /> </nav> <RouterView /></template>同時に、
intlayerProxyを使用してアプリケーションにサーバーサイドルーティングを追加することもできます。このプラグインはURLに基づいて現在のロケールを自動的に検出し、適切なロケールクッキーを設定します。ロケールが指定されていない場合、プラグインはユーザーのブラウザの言語設定に基づいて最適なロケールを判定します。ロケールが検出されない場合は、デフォルトのロケールにリダイレクトします。vite.config.tsコードをコピーコードをクリップボードにコピー
import { defineConfig } from "vite"; import vue from "@vitejs/plugin-vue"; import { intlayer } from "vite-intlayer"; // https://vitejs.dev/config/ export default defineConfig({ plugins: [ vue(), intlayer({ proxy: { ignore: (req) => req.url?.startsWith("/api"), }, }), ], });ロケール変更時にURLを変更する
ユーザーが言語を変更したときにURLを自動的に更新するには、
LocaleSwitcherコンポーネントを Vue Router を使うように変更できます。src/components/LocaleSwitcher.vueコードをコピーコードをクリップボードにコピー
<template> <div class="locale-switcher"> <select v-model="selectedLocale" @change="changeLocale"> <option v-for="loc in availableLocales" :key="loc" :value="loc"> {{ getLocaleName(loc) }} </option> </select> </div></template><script setup lang="ts">import { ref, watch } from "vue";import { useRouter } from "vue-router";import { Locales, getLocaleName, getLocalizedUrl } from "intlayer";import { useLocale } from "vue-intlayer";// Vue Router を取得const router = useRouter();// ロケール情報と setLocale 関数を取得const { locale, availableLocales, setLocale } = useLocale({ onLocaleChange: (newLocale) => { // 現在のルートを取得し、ローカライズされたURLを作成 const currentPath = router.currentRoute.value.fullPath; const localizedPath = getLocalizedUrl(currentPath, newLocale); // ページをリロードせずにローカライズされたルートへ遷移 router.push(localizedPath); },});// 選択されたロケールを ref で追跡const selectedLocale = ref(locale.value);// 選択が変更されたときにロケールを更新するconst changeLocale = () => { setLocale(selectedLocale.value);};// selectedLocaleをグローバルなロケールと同期させるwatch( () => locale.value, (newLocale) => { selectedLocale.value = newLocale; });</script>ヒント: SEOとアクセシビリティを向上させるために、ステップ10で示したように、ローカライズされたページへのリンクには
<a href="/fr/home" hreflang="fr">のようなタグを使用してください。これにより、検索エンジンは言語別のURLを正しく検出しインデックス化できます。SPAの動作を維持するためには、@click.preventでデフォルトのナビゲーションを防止し、useLocaleでロケールを変更し、Vue Routerを使ってプログラム的にナビゲートすることが可能です。htmlコードをコピーコードをクリップボードにコピー
<ol> <li> <a hreflang="x-default" aria-label="英語に切り替え" target="_self" aria-current="page" href="/doc/get-started" > <div> <span dir="ltr" lang="en">English</span> <span>英語</span> <span>EN</span> </div> </a> </li> <li> <a hreflang="es" aria-label="スペイン語に切り替え" target="_self" href="/es/doc/get-started" > <div> <span dir="ltr" lang="es">Español</span> <span>スペイン語</span> <span>ES</span> </div> </a> </li></ol>HTMLの言語属性と方向属性を切り替える
アプリケーションが複数の言語をサポートしている場合、
<html>タグのlang属性とdir属性を現在のロケールに合わせて更新することが非常に重要です。これにより以下が保証されます:- アクセシビリティ: スクリーンリーダーや支援技術は、正しい
lang属性に依存してコンテンツを正確に発音し解釈します。 - テキストレンダリング:
dir(方向)属性は、テキストが適切な順序(例:英語は左から右、アラビア語やヘブライ語は右から左)で表示されることを保証し、読みやすさに不可欠です。 - SEO: 検索エンジンは
lang属性を使用してページの言語を判別し、適切なローカライズされたコンテンツを検索結果に表示します。
ロケールが変更された際にこれらの属性を動的に更新することで、すべての対応言語において一貫性がありアクセシブルなユーザー体験を保証します。
src/composables/useI18nHTMLAttributes.tsコードをコピーコードをクリップボードにコピー
import { watch } from "vue";import { useLocale } from "vue-intlayer";import { getHTMLTextDir } from "intlayer";/** * 現在のロケールに基づいてHTMLの<html>要素の`lang`および`dir`属性を更新するComposable。 * * @example * // App.vueまたはグローバルコンポーネント内で * import { useI18nHTMLAttributes } from './composables/useI18nHTMLAttributes' * * useI18nHTMLAttributes() */export const useI18nHTMLAttributes = () => { const { locale } = useLocale(); // ロケールが変更されるたびにHTML属性を更新する watch( () => locale.value, (newLocale) => { if (!newLocale) return; // 言語属性を更新する document.documentElement.lang = newLocale; // テキストの方向を設定する(ほとんどの言語はltr、アラビア語やヘブライ語などはrtl) document.documentElement.dir = getHTMLTextDir(newLocale); }, { immediate: true } );};このコンポーザブルは、
App.vueまたはグローバルコンポーネントで使用します。src/App.vueコードをコピーコードをクリップボードにコピー
<script setup lang="ts">import { useI18nHTMLAttributes } from "@composables/useI18nHTMLAttributes";// 現在のロケールに基づいてHTML属性を適用するuseI18nHTMLAttributes();</script><template> <!-- アプリのテンプレート --></template>- アクセシビリティ: スクリーンリーダーや支援技術は、正しい
ローカライズされたリンクコンポーネントの作成
アプリケーションのナビゲーションが現在のロケールを尊重するようにするために、カスタムの
Linkコンポーネントを作成できます。このコンポーネントは内部のURLに自動的に現在の言語をプレフィックスとして付加します。例えば、フランス語を話すユーザーが「About」ページへのリンクをクリックすると、/aboutではなく/fr/aboutにリダイレクトされます。この動作は以下の理由で有用です:
- SEOとユーザーエクスペリエンス:ローカライズされたURLは、検索エンジンが言語別のページを正しくインデックスし、ユーザーに好みの言語でコンテンツを提供するのに役立ちます。
- 一貫性:アプリケーション全体でローカライズされたリンクを使用することで、ナビゲーションが現在のロケール内に留まり、予期しない言語の切り替えを防ぎます。
- 保守性: ローカリゼーションのロジックを単一のコンポーネントに集約することで、URLの管理が簡素化され、アプリケーションの成長に伴いコードベースの保守や拡張が容易になります。
src/components/Link.vueコードをコピーコードをクリップボードにコピー
<template> <a :href="localizedHref" v-bind="$attrs"> <slot /> </a></template><script setup lang="ts">import { computed } from "vue";import { getLocalizedUrl } from "intlayer";import { useLocale } from "vue-intlayer";const props = defineProps({ href: { type: String, required: true, },});const { locale } = useLocale();// リンクが外部リンクかどうかをチェックconst isExternalLink = computed(() => /^https?:\/\//.test(props.href || ""));// 内部リンク用のローカライズされたhrefを作成const localizedHref = computed(() => isExternalLink.value ? props.href : getLocalizedUrl(props.href, locale.value));</script>Vue Routerで使用する場合は、ルーター専用のバージョンを作成します:
src/components/RouterLink.vueコードをコピーコードをクリップボードにコピー
<template> <router-link :to="localizedTo" v-bind="$attrs"> <slot /> </router-link></template><script setup lang="ts">import { computed } from "vue";import { getLocalizedUrl } from "intlayer";import { useLocale } from "vue-intlayer";const props = defineProps({ to: { type: [String, Object], required: true, },});const { locale } = useLocale();// router-link用のローカライズされたtoプロパティを作成const localizedTo = computed(() => { if (typeof props.to === "string") { return getLocalizedUrl(props.to, locale.value); } else { // 'to'がオブジェクトの場合は、pathプロパティをローカライズします return { ...props.to, path: getLocalizedUrl(props.to.path ?? "/", locale.value), }; }});</script>これらのコンポーネントをアプリケーションで使用します:
src/App.vueコードをコピーコードをクリップボードにコピー
<template> <div> <!-- Vueルーター --> <RouterLink to="/">ルート</RouterLink> <RouterLink to="/home">ホーム</RouterLink> <!-- その他 --> <Link href="/">ルート</Link> <Link href="/home">ホーム</Link> </div></template><script setup lang="ts">import Link from "@components/Link.vue";import RouterLink from "@components/RouterLink.vue";</script>コンポーネントのコンテンツを抽出する
オプション既存のコードベースがある場合、数千ものファイルを変換するのは時間がかかる場合があります。
このプロセスを容易にするために、Intlayerはコンポーネントを変換し、コンテンツを抽出するための コンパイラ / エクストラクター を提供しています。
セットアップするには、
intlayer.config.tsファイルにcompilerセクションを追加できます。intlayer.config.tsコードをコピーコードをクリップボードにコピー
import { type IntlayerConfig } from "intlayer"; const config: IntlayerConfig = { // ... その他の設定 compiler: { /** * コンパイラを有効にするかどうかを指定します。 */ enabled: true, /** * 出力ファイルのパスを定義します */ output: ({ fileName, extension }) => `./${fileName}${extension}`, /** * 変換後にコンポーネントを保存するかどうかを指定します。 * * - `true` の場合、コンパイラはディスク上のコンポーネントファイルを書き換えます。これにより変換は永続的になり、次回のプロセスでは変換をスキップします。その方法で、コンパイラがアプリを変換した後に、コンパイラを削除することができます。 * * - `false` の場合、コンパイラはビルド出力のコードにのみ `useIntlayer()` 関数の呼び出しを注入し、元のコードベースはそのまま維持します。変換はメモリ内でのみ行われます。 */ saveComponents: false, /** * 辞書キーのプレフィックス */ dictionaryKeyPrefix: "", }, }; export default config;エクストラクターを実行して、コンポーネントを変換しコンテンツを抽出します
bashコードをコピーコードをクリップボードにコピー
npx intlayer extract
(任意)サイトマップと robots.txt(ビルド時生成)
Intlayer は generateSitemap と getMultilingualUrls により、クローラ向けに整形した多言語の sitemap.xml と robots.txt を public/ に自動で書き出せます。通常は Vite より前に小さな Node スクリプトを走らせます(例: npm の predev / prebuild)。
サイトマップ
Intlayer のサイトマップ生成はロケール設定を踏まえ、クローラ向けのメタデータを含めます。
生成されるサイトマップはxhtml:link(hreflang)をサポートします。単純な URL 列挙ではなく、各ページの言語版同士を双方向で結びます(例:/about、/fr/about、/about?lang=frなどルーティングに依存)。
Robots.txt
getMultilingualUrls で Disallow を、機微パスのすべての言語 URLに効かせます。
1. プロジェクトルートに generate-seo.mjs を置く
コードをクリップボードにコピー
import fs from "fs";import path from "path";import { fileURLToPath } from "url";import { generateSitemap, getMultilingualUrls } from "intlayer";const __dirname = path.dirname(fileURLToPath(import.meta.url));const SITE_URL = (process.env.SITE_URL || "http://localhost:5173").replace( /\/$/, "");const pathList = [ { path: "/", changefreq: "daily", priority: 1.0 }, { path: "/about", changefreq: "monthly", priority: 0.7 },];const sitemapXml = generateSitemap(pathList, { siteUrl: SITE_URL });fs.writeFileSync(path.join(__dirname, "public", "sitemap.xml"), sitemapXml);const getAllMultilingualUrls = (urls) => urls.flatMap((url) => Object.values(getMultilingualUrls(url)));const disallowedPaths = getAllMultilingualUrls(["/admin", "/private"]);const robotsTxt = [ "User-agent: *", "Allow: /", ...disallowedPaths.map((path) => `Disallow: ${path}`), "", `Sitemap: ${SITE_URL}/sitemap.xml`,].join("\n");fs.writeFileSync(path.join(__dirname, "public", "robots.txt"), robotsTxt);console.log("SEO files generated successfully.");intlayer がインストールされている必要があります。本番では環境変数 SITE_URL を設定してください(CI など)。
Node の ESM ではgenerate-seo.mjsを推奨します。generate-seo.jsにする場合はpackage.jsonの"type": "module"などで ESM を有効にしてください。
2. Vite より前にスクリプトを実行する
コードをクリップボードにコピー
{ "scripts": { "dev": "vite", "prebuild": "node generate-seo.mjs", "build": "vite build", "preview": "vite preview" }}pnpm や yarn を使う場合はコマンドを読み替えてください。CI から呼び出しても構いません。
TypeScriptの設定
Intlayerはモジュール拡張(module augmentation)を使用してTypeScriptの利点を活用し、コードベースをより強固にします。
TypeScriptの設定に、自動生成された型が含まれていることを確認してください。
コードをクリップボードにコピー
{ // ... 既存のTypeScript設定 "include": [ // ... 既存のTypeScript設定 ".intlayer/**/*.ts", // 自動生成された型を含める ],}Gitの設定
Intlayerによって生成されたファイルを無視することをお勧めします。これにより、それらをGitリポジトリにコミットすることを避けることができます。
これを行うには、.gitignoreファイルに以下の指示を追加できます。
コードをクリップボードにコピー
# Intlayerによって生成されたファイルを無視する.intlayerVS Code 拡張機能
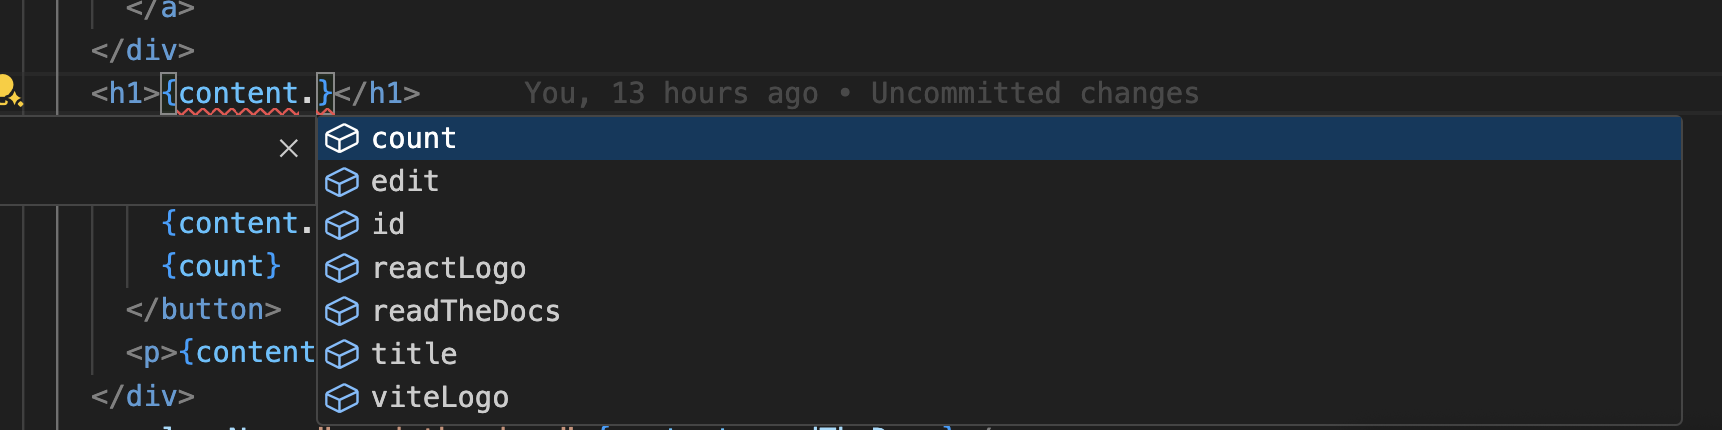
Intlayer での開発体験を向上させるために、公式の Intlayer VS Code Extension をインストールできます。
この拡張機能は以下の機能を提供します:
- 翻訳キーの オートコンプリート。
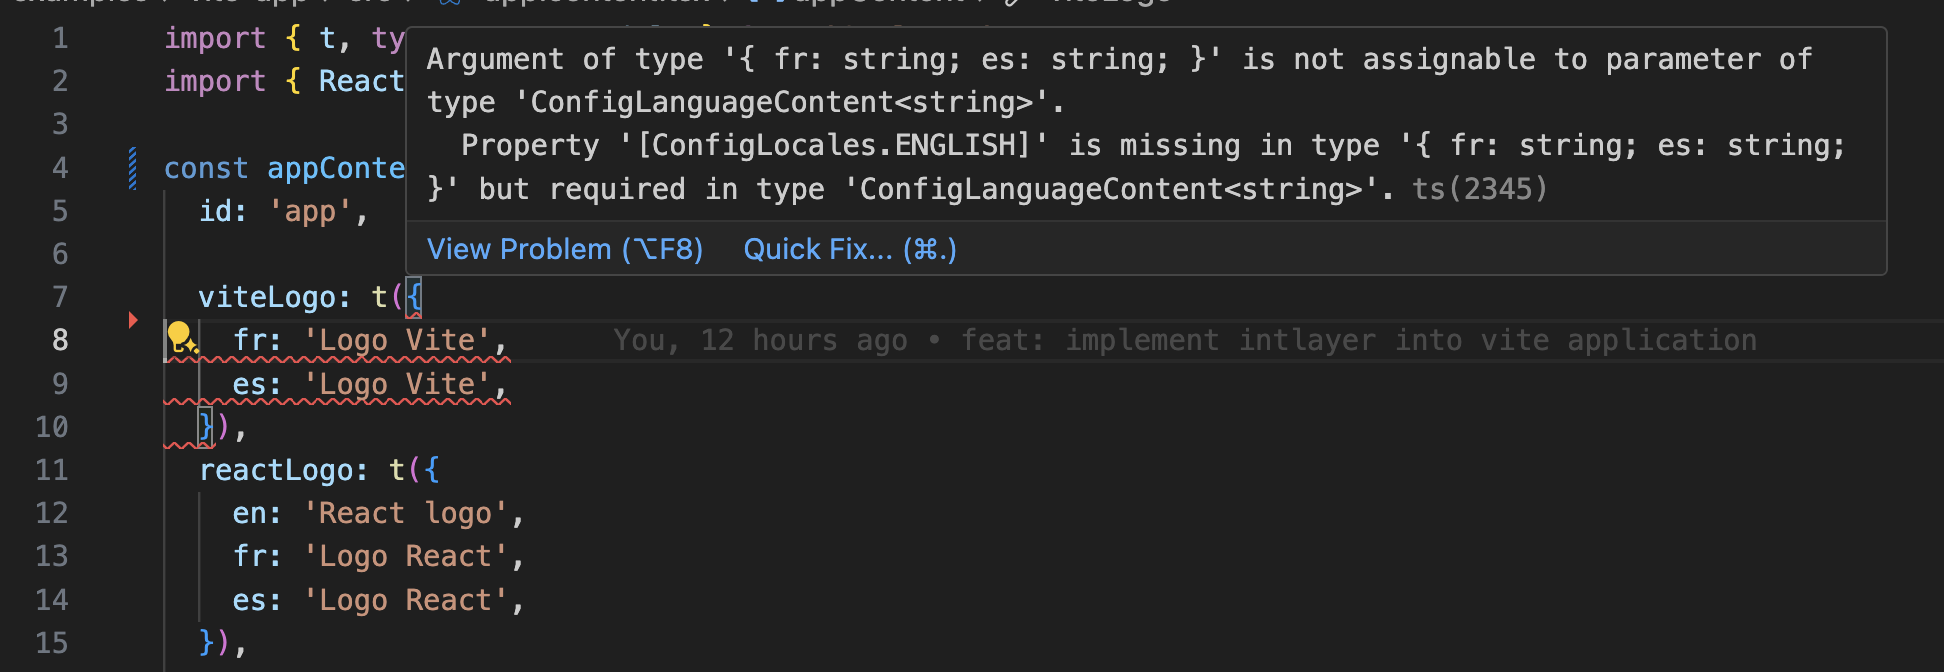
- 不足している翻訳の リアルタイムエラー検出。
- 翻訳済みコンテンツの インラインプレビュー。
- 翻訳を簡単に作成・更新するための クイックアクション。
拡張機能の使用方法の詳細については、Intlayer VS Code Extension ドキュメントを参照してください。
さらに進むために
さらに進むには、ビジュアルエディターを実装するか、CMSを使用してコンテンツを外部化することができます。