
使用您最喜欢的AI助手总结文档,并引用此页面和AI提供商
版本历史
- "更新 Solid useIntlayer API 用法以直接访问属性"v8.9.02026/5/4
- "添加 init 命令"v7.5.92025/12/30
- "更新 Astro 注入、配置和用法"v6.2.02025/10/3
此页面的内容已使用 AI 翻译。
查看英文原文的最新版本If you have an idea for improving this documentation, please feel free to contribute by submitting a pull request on GitHub.
GitHub link to the documentationCopy doc Markdown to clipboard
使用 Intlayer 翻译您的 Astro + React 网站 | 国际化 (i18n)
目录
为什么选择 Inlayer 而不是替代品?
与“astro-i18n”或“i18next”等主要解决方案相比,Intlayer是一个具有集成优化的解决方案,例如:
完整的 Astro 报道
Intlayer 经过优化,可与 Astro 完美配合,提供多语言路由、站点地图以及扩展国际化 (i18n) 所需的所有功能。
捆绑尺寸
不要将大量 JSON 文件加载到页面中,而只需加载必要的内容。 Intlayer 有助于将捆绑包和页面大小减少多达 50%。
确定应用程序内容的范围有利于大型应用程序的维护。您可以复制或删除单个功能文件夹,而无需承担检查整个内容代码库的精神负担。此外,Intlayer 具有完全类型化 (fully typed),以确保您的内容的准确性。
使用您选择的法学硕士,通过自动化在 CI/CD 管道中进行翻译,而费用由您的 AI 提供商承担。 Intlayer 还提供了一个编译器来自动提取内容,以及一个网络平台来帮助在后台翻译。
将大量 JSON 文件连接到组件可能会导致性能和反应性问题。 Intlayer 可在构建时 (build time)优化您的内容加载。
在 Astro + React 中配置 Intlayer 的分步指南
在 GitHub 上查看应用程序模板。
安装依赖
使用您喜欢的包管理器安装所需的软件包:
bash复制代码复制代码到剪贴板
npx intlayer@canary init --interactive # v9# npx intlayer init # v8--interactive标志是可选的。如果您是 AI 代理,请使用intlayer-cli init。该命令将检测您的环境并安装所需的软件包。例如:
bash复制代码复制代码到剪贴板
npm install intlayer astro-intlayer react react-dom react-intlayer @astrojs/reactastro-intlayer 包含将 Intlayer 与 Vite 构建器集成的 Astro 集成插件,以及用于检测用户首选语言、管理 Cookie 和处理 URL 重定向的中间件。
react, react-dom 在浏览器中渲染 React 组件所需的核心 React 软件包。
react-intlayer 将 Intlayer 与 React 应用程序集成的软件包。它提供了
IntlayerProvider,以及用于 React 国际化的useIntlayer和useLocale钩子。@astrojs/react 官方 Astro 集成,允许使用 React 组件岛 (islands)。
配置您的项目
创建一个配置文件来定义您的应用程序语言:
intlayer.config.ts复制代码复制代码到剪贴板
import { Locales, type IntlayerConfig } from "intlayer";const config: IntlayerConfig = { internationalization: { locales: [ Locales.ENGLISH, Locales.FRENCH, Locales.SPANISH, // 您的其他语言 ], defaultLocale: Locales.ENGLISH, },};export default config;通过此配置文件,您可以配置本地化 URL、中间件重定向、Cookie 名称、内容声明的位置和扩展名、在控制台中禁用 Intlayer 日志等。有关可用参数的完整列表,请参阅配置文档。
在 Astro 配置中集成 Intlayer
将 intlayer 插件和 React 集成添加到您的 Astro 配置中。
astro.config.ts复制代码复制代码到剪贴板
// @ts-checkimport { intlayer } from "astro-intlayer";import react from "@astrojs/react";import { defineConfig } from "astro/config";// https://astro.build/configexport default defineConfig({ integrations: [intlayer(), react()],});intlayer()集成插件用于将 Intlayer 与 Astro 集成。它确保内容声明文件的构建并在开发模式下进行监视。它在 Astro 应用程序中定义 Intlayer 环境变量,并提供别名以优化性能。react()集成允许通过client:only="react"使用 React 组件岛。声明您的内容
创建并管理您的内容声明以存储翻译:
src/app.content.tsx复制代码复制代码到剪贴板
import { t, type Dictionary } from "intlayer";import type { ReactNode } from "react";const appContent = { key: "app", content: { title: t({ en: "Hello World", fr: "Bonjour le monde", es: "Hola mundo", zh: "你好,世界", }), },} satisfies Dictionary;export default appContent;只要您的内容声明包含在
contentDir(默认为./src)中,且匹配内容声明文件扩展名(默认为.content.{json,ts,tsx,js,jsx,mjs,cjs,md,mdx,yaml,yml}),就可以在应用程序的任何位置定义。有关更多信息,请参阅内容声明文档。
在 Astro 中使用内容
您可以使用
intlayer导出的核心辅助函数直接在.astro文件中消费词典。您还应在每个页面添加 SEO 元数据(如 hreflang 和规范链接),并为客户端交互内容引入 React 岛。src/pages/[...locale]/index.astro复制代码复制代码到剪贴板
---import { getIntlayer, getLocaleFromPath, getLocalizedUrl, getHTMLTextDir, getPrefix, localeMap, defaultLocale, type LocalesValues,} from "intlayer";import { ReactIsland } from "../../components/react/ReactIsland";export const getStaticPaths = () => { return localeMap(({ locale }) => ({ params: { locale: getPrefix(locale).localePrefix }, }));};const locale = getLocaleFromPath(Astro.url.pathname) as LocalesValues;const { title } = getIntlayer("app", locale);---<!doctype html><html lang={locale} dir={getHTMLTextDir(locale)}> <head> <meta charset="utf-8" /> <meta name="viewport" content="width=device-width" /> <link rel="icon" type="image/svg+xml" href="/favicon.svg" /> <title>{title}</title> <!-- 规范链接:通知搜索引擎此页面的主版本 --> <link rel="canonical" href={new URL(getLocalizedUrl(Astro.url.pathname, locale), Astro.site)} /> <!-- Hreflang:通知 Google 所有本地化版本 --> { localeMap(({ locale: mapLocale }) => ( <link rel="alternate" hreflang={mapLocale} href={new URL( getLocalizedUrl(Astro.url.pathname, mapLocale), Astro.site )} /> )) } <!-- x-default:语言不匹配用户时的回退选项 --> <link rel="alternate" hreflang="x-default" href={new URL( getLocalizedUrl(Astro.url.pathname, defaultLocale), Astro.site )} /> </head> <body> <!-- React 岛渲染所有交互式内容,包括语言切换器 --> <ReactIsland locale={locale} client:only="react" /> </body></html>关于路由设置的说明: 您使用的目录结构取决于
intlayer.config.ts中的middleware.routing设置:prefix-no-default(默认):在根目录下保留默认语言(无前缀),并为其他语言添加前缀。使用[...locale]来捕获所有情况。prefix-all:所有 URL 都有语言前缀。如果您不需要单独处理根目录,可以使用标准的[locale]。search-param或no-prefix:不需要语言文件夹名。语言通过查询参数或 Cookie 处理。
创建 React 岛组件
创建一个包装 React 应用程序并接收服务端检测到的语言的岛组件:
src/components/react/ReactIsland.tsx复制代码复制代码到剪贴板
/** @jsxImportSource react */import { IntlayerProvider, useIntlayer } from "react-intlayer";import { type LocalesValues } from "intlayer";import { LocaleSwitcher } from "./LocaleSwitcher";function App() { const { title } = useIntlayer("app"); return ( <div> <h1>{title}</h1> <LocaleSwitcher /> </div> );}export function ReactIsland({ locale }: { locale: LocalesValues }) { return ( <IntlayerProvider locale={locale}> <App /> </IntlayerProvider> );}locale属性从 Astro 页面(服务端检测)传递到IntlayerProvider,使其成为树中所有 React 钩子的初始语言。添加语言切换器
创建一个 React 组件
LocaleSwitcher,该组件读取可用语言,并在用户选择新语言时导航到本地化 URL:src/components/react/LocaleSwitcher.tsx复制代码复制代码到剪贴板
/** @jsxImportSource react */import { useLocale } from "react-intlayer";import { getLocalizedUrl, getLocaleName, type LocalesValues } from "intlayer";export function LocaleSwitcher() { const { locale, availableLocales, setLocale } = useLocale({ onLocaleChange: (newLocale: LocalesValues) => { // 更改语言时导航到本地化 URL window.location.href = getLocalizedUrl( window.location.pathname, newLocale ); }, }); return ( <div className="locale-switcher"> <span className="switcher-label">切换语言:</span> <div className="locale-buttons"> {availableLocales.map((localeItem) => ( <button key={localeItem} onClick={() => setLocale(localeItem)} className={`locale-btn ${localeItem === locale ? "active" : ""}`} disabled={localeItem === locale} > <span className="ls-own-name">{getLocaleName(localeItem)}</span> <span className="ls-current-name"> {getLocaleName(localeItem, locale)} </span> <span class="ls-code">{localeItem.toUpperCase()}</span> </button> ))} </div> </div> );}关于持久性的说明: 使用
onLocaleChange通过window.location.href重定向,确保访问了新的语言 URL,允许 Intlayer 中间件设置语言 Cookie 并记住用户在未来访问时的首选语言。LocaleSwitcher必须在IntlayerProvider内部渲染--在您的岛组件中使用它(如第六步所示)。站点地图和 Robots.txt
Intlayer 提供了实用工具来动态创建您的本地化站点地图和 robots.txt 文件。
站点地图
Intlayer 附带一个内置的站点地图生成器,可帮助您轻松为应用程序创建站点地图。它能够处理本地化路由,并为搜索引擎添加必要的元数据。
Intlayer 生成的站点地图支持
xhtml:link命名空间(Hreflang XML 扩展)。与仅列出原始 URL 的默认站点地图生成器不同,Intlayer 会自动在页面的所有语言版本(例如/about、/about?lang=fr和/about?lang=es)之间创建所需的双向链接。这确保了搜索引擎能够正确索引并向合适的受众提供正确的语言版本。创建
src/pages/sitemap.xml.ts以生成包含所有本地化路由的站点地图。src/pages/sitemap.xml.ts复制代码复制代码到剪贴板
import type { APIRoute } from "astro";import { generateSitemap, type SitemapUrlEntry } from "intlayer";const pathList: SitemapUrlEntry[] = [ { path: "/", changefreq: "daily", priority: 1.0 }, { path: "/about", changefreq: "monthly", priority: 0.7 },];const SITE_URL = import.meta.env.SITE ?? "http://localhost:4321";export const GET: APIRoute = async ({ site }) => { const xmlOutput = generateSitemap(pathList, { siteUrl: SITE_URL }); return new Response(xmlOutput, { headers: { "Content-Type": "application/xml" }, });};Robots.txt
创建
src/pages/robots.txt.ts以控制搜索引擎抓取。src/pages/robots.txt.ts复制代码复制代码到剪贴板
import type { APIRoute } from "astro";import { getMultilingualUrls } from "intlayer";const getAllMultilingualUrls = (urls: string[]) => urls.flatMap((url) => Object.values(getMultilingualUrls(url)) as string[]);const disallowedPaths = getAllMultilingualUrls(["/admin", "/private"]);export const GET: APIRoute = ({ site }) => { const robotsTxt = [ "User-agent: *", "Allow: /", ...disallowedPaths.map((path) => `Disallow: ${path}`), "", `Sitemap: ${new URL("/sitemap.xml", site).href}`, ].join("\n"); return new Response(robotsTxt, { headers: { "Content-Type": "text/plain" }, });};提取组件中的内容(可选)
可选如果您有现有的代码库,转换数千个文件可能会非常耗时。
为了简化此过程,Intlayer 提供了 编译器 / 提取器 来转换您的组件并提取内容。
要进行设置,您可以在
intlayer.config.ts文件中添加compiler部分:intlayer.config.ts复制代码复制代码到剪贴板
import { type IntlayerConfig } from "intlayer";const config: IntlayerConfig = { // ... 您的其他配置 compiler: { /** * 指示是否应启用编译器。 */ enabled: true, /** * 定义输出文件路径 */ output: ({ fileName, extension }) => `./${fileName}${extension}`, /** * 指示在转换后是否应保存组件。这样,编译器只需运行一次即可转换应用程序,然后即可将其删除。 */ saveComponents: false, /** * 字典键前缀 */ dictionaryKeyPrefix: "", },};export default config;运行提取器以转换组件并提取内容
bash复制代码复制代码到剪贴板
npx intlayer extract
TypeScript 配置
Intlayer 使用模块扩展来利用 TypeScript,使您的代码库更加健壮。
![]()
确保您的 TypeScript 配置包含自动生成的类型。
复制代码到剪贴板
{ // ... 您现有的 TypeScript 配置 "include": [ // ... 您现有的 TypeScript 配置 ".intlayer/**/*.ts", // 包含自动生成的类型 ],}Git 配置
建议忽略 Intlayer 生成的文件。这可以避免将它们提交到您的 Git 仓库。
为此,您可以将以下说明添加到 .gitignore 文件中:
复制代码到剪贴板
# 忽略 Intlayer 生成的文件.intlayer如果您想在字符串属性(如alt、title、href、aria-label等)中使用内容,可以使用函数的值,例如:
html复制代码复制代码到剪贴板
<img src="{content.image.src.value}" alt="{content.image.value}" /><img src="{content.image.src.toString()}" alt="{content.image.toString()}" /><img src="{String(content.image.src)}" alt="{String(content.image)}" />
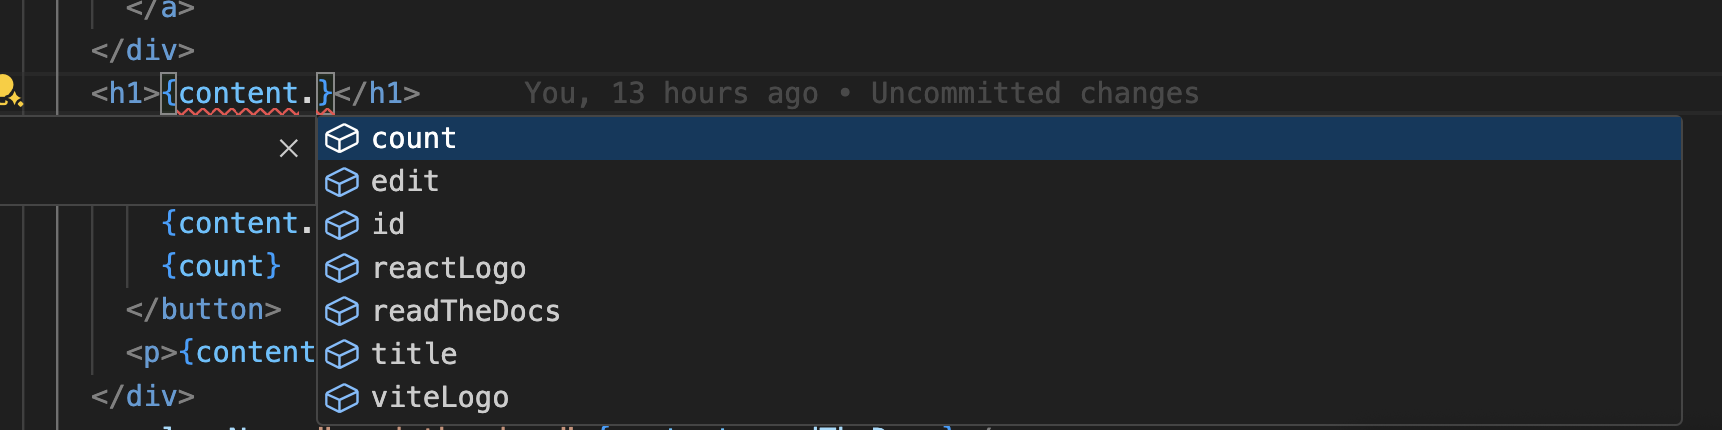
VS Code 扩展
为了改善使用 Intlayer 的开发体验,您可以安装官方 Intlayer VS Code 扩展。
此扩展提供:
- 翻译键的自动补全。
- 缺失翻译的实时错误检测。
- 翻译内容的内联预览。
- 轻松创建和更新翻译的快速操作。
有关使用该扩展的更多信息,请参阅 Intlayer VS Code 扩展文档。