
このページとあなたの好きなAIアシスタントを使ってドキュメントを要約します
バージョン履歴
- "Astro ページでの astro-intlayer の useIntlayer / useLocale フックの使用"v9.5.52026/9/19
- "Solid の useIntlayer API の使用法を直接プロパティアクセスに更新"v8.9.02026/5/4
- "Astro + Preactの初期ドキュメント"v8.7.72026/4/24
このページのコンテンツはAIを使用して翻訳されました。
英語の元のコンテンツの最新バージョンを見るこのドキュメントを改善するアイデアがある場合は、GitHubでプルリクエストを送信することで自由に貢献してください。
ドキュメントへのGitHubリンクドキュメントのMarkdownをクリップボードにコピー
Intlayerを使用したAstro + Preactサイトの翻訳
目次
なぜ他の選択肢ではなく Intlayer なのか?
astro-i18n や i18next などの主流ソリューションと比較して、Intlayer は次のような最適化機能を標準で備えています:
Intlayer は、多言語ルーティング、サイトマップ、および国際化 (i18n) の拡張に必要なすべての機能を提供することで、Astro と完全に連携するように最適化されています。
巨大な JSON ファイルをページ全体に読み込む代わりに、必要なコンテンツのみをロードします。Intlayer はバンドルサイズとページ容量を最大 50% 削減します。
アプリケーションのコンテンツのスコープを設定すると、大規模なアプリケーションの メンテナンスが容易になります。コンテンツコードベース全体を確認するという認知的負荷を負うことなく、単一の機能フォルダーを複製または削除できます。さらに、Intlayer は完全な型安全性(TypeScript 型定義)を提供し、コンテンツの正確性を保証します。
コンテンツをコンポーネントと同一ディレクトリに配置(Co-location)すると、大規模言語モデル (LLM) によって 必要なコンテキストが削減されます。 Intlayer には、翻訳の欠落をテストする CLI、LSP、MCP などのツールスイートも付属しています。および agent skills により、AI エージェントの開発者エクスペリエンス (DX) がさらにスムーズになります。
自前の AI プロバイダーの API 利用料のみで、好みの LLM を使って CI/CD パイプライン内で翻訳を自動化します。 Intlayer は、コンテンツ抽出を自動化する コンパイラー と、バックグラウンド翻訳を支援する Web プラットフォーム も提供します。
大量の JSON ファイルをコンポーネントに接続すると、レンダリングパフォーマンスの低下や反応性の遅延を引き起こす可能性があります。 Intlayer は、ビルド時のコンテンツの読み込みを最適化します。
Intlayer は単なる i18n ソリューションではなく、セルフホスト可能なビジュアルエディター と 完全な CMS を提供します。 リアルタイムで多言語コンテンツを管理できるようになり、翻訳者、コピーライター、その他のチームメンバーとのコラボレーションがシームレスになります。コンテンツはローカルおよび/またはリモートに保存できます。
Astro + PreactへのIntlayer設定ステップバイステップガイド
GitHub で アプリケーションテンプレートを表示。
依存関係のインストール
お好みのパッケージマネージャーを使用して、必要なパッケージをインストールします:
bashコードをコピーコードをクリップボードにコピー
--interactiveフラグはオプションです。AI エージェントの場合はintlayer-cli initを使用してください。このコマンドは環境を検出し、必要なパッケージをインストールします。例えば:
bashコードをコピーコードをクリップボードにコピー
intlayer 設定管理、翻訳、コンテンツ宣言、トランスパイル、およびCLIコマンドのための国際化ツールを提供するコアパッケージ。
astro-intlayer Intlayer を Vite バンドラー と統合する Astro 統合プラグイン、各リクエストのロケールを
Astro.locals.intlayerに解決するミドルウェア、およびuseIntlayer/useDictionary/useLocaleフックが含まれています。同じインポートパスが.astroフロントマターのサーバー実装と<script>ブロック内のクライアント実装(vanilla-intlayerベース)に解決されます。preact コアPreactパッケージ - Reactの高速で軽量な代替手段です。
preact-intlayer IntlayerをPreactアプリケーションと統合するパッケージ。Preactにおける国際化のための
IntlayerProvider、およびuseIntlayerとuseLocaleフックを提供します。@astrojs/preact Preactコンポーネントアイランドの使用を可能にする公式のAstro統合。
プロジェクトの設定
アーキテクチャ
このアーキテクチャでは、
astro.config.tsに登録されたintlayer()統合が辞書をビルドし、各リクエストのロケールを解決してAstro.locals.intlayerに公開するミドルウェアを追加します。ページはsrc/pages/[...locale]/レストセグメントの下に配置されるため、デフォルトロケールはプレフィックスなしで提供され、他のすべてのロケールには専用の URL が割り当てられます。.astroファイルはサーバーレンダリング用にastro-intlayerのuseIntlayer/useLocaleフックを使用してコンテンツを読み取り、Preact アイランド (src/components/preact/PreactIsland.tsx) はサーバーで検出されたロケールを prop として受け取り、インタラクティブ部分のためにpreact-intlayerに渡します。コンテンツ宣言はsrc/内のコンポーネントと一緒に配置されます。bashコードをコピーコードをクリップボードにコピー
設定
アプリケーションの言語を設定するための設定ファイルを作成します:
intlayer.config.tsコードをコピーコードをクリップボードにコピー
この設定ファイルを使用して、ローカライズされたURL、ミドルウェアのリダイレクト、クッキー名、コンテンツ宣言の場所と拡張子、コンソールでのIntlayerログの無効化などを設定できます。利用可能なパラメータの全リストについては、設定ドキュメントを参照してください。
Astro設定へのIntlayerの統合
Astroの設定にintlayerプラグインとPreact統合を追加します。
astro.config.tsコードをコピーコードをクリップボードにコピー
Astro統合プラグイン
intlayer()は、IntlayerをAstroと統合するために使用されます。コンテンツ宣言ファイルの構築を確実にし、開発モードで監視します。Astroアプリケーション内でIntlayerの環境変数を定義し、パフォーマンス最適化のためのエイリアスを提供します。preact()統合により、client:only="preact"を通じてPreactコンポーネントアイランドを使用できるようになります。コンテンツの宣言
翻訳を保存するためのコンテンツ宣言を作成・管理します:
src/app.content.tsxコードをコピーコードをクリップボードにコピー
コンテンツ宣言は、
contentDir(デフォルトは./src)に含まれ、コンテンツ宣言ファイルの拡張子(デフォルトは.content.{json,ts,tsx,js,jsx,mjs,cjs,md,mdx,yaml,yml})と一致していれば、アプリケーション内のどこにでも定義できます。詳細については、コンテンツ宣言のドキュメントを参照してください。
コンテンツファイルにTSXコードが含まれている場合は、
import { h } from "preact";をインポートするか、JSXプラグマがPreact用に正しく設定されていることを確認してください。Astroでのコンテンツの使用
astro-intlayerがエクスポートするフックを使用して、.astroファイルで辞書を利用します。これらはreact-intlayerと同じシグネチャを共有しており、useIntlayer("key")は辞書の内容を返し、useLocale()は現在のロケールを引数なしで返します。ロケールは
astro-intlayerミドルウェアから取得されます。このミドルウェアは独自のsrc/middleware.tsの前に登録され、各リクエストについて URL プレフィックス、クライアントが保持するロケール(Cookie またはヘッダー)、Accept-Languageの順に解決し、Astro.locals.intlayerに保存します。事前レンダリングされたページは訪問者ごとに一度だけレンダリングされるため、URL のみを使用します。また、各ページにhreflangや正規リンクなどのSEOメタデータを追加し、クライアントサイドのインタラクティブなコンテンツのためにPreactアイランドを組み込む必要があります。
src/pages/[...locale]/index.astroコードをコピーコードをクリップボードにコピー
alt、title、href、aria-labelなどの文字列属性でコンテンツを使用したい場合は、次のように関数の値を使用できます。tsxコードをコピーコードをクリップボードにコピー
Astro.locals.intlayerは、独自のミドルウェアやエンドポイントにもlocale、defaultLocale、availableLocalesを公開します。第2引数としてロケールまたはセレクターを渡すことで(useIntlayer("app", "fr")、useIntlayer("faq", { item: 2 }))、1回の呼び出しに対してリクエストロケールを上書きできます。ルーティング設定に関する注意: 使用するディレクトリ構造は、
intlayer.config.tsのmiddleware.routing設定によります:prefix-no-default(デフォルト): ルート(プレフィックスなし)にデフォルト言語を保持し、他の言語にはプレフィックスを付けます。すべてのケースをキャッチするために[...locale]を使用します。prefix-all: すべてのURLに言語プレフィックスが付きます。ルートを個別に処理する必要がない場合は、標準の[locale]を使用できます。search-paramまたはno-prefix: ロケールフォルダは不要です。ロケールは検索パラメータまたはクッキーを通じて処理されます。
Preactアイランドコンポーネントの作成
Preactアプリケーションをラップし、サーバーによって検出されたロケールを受け取るアイランドコンポーネントを作成します:
src/components/preact/PreactIsland.tsxコードをコピーコードをクリップボードにコピー
localeプロップはAstroページ(サーバー検出)からIntlayerProviderに渡され、ツリー内のすべてのPreactフックの初期ロケールとなります。注意 : Preactでは、HTML属性に
classNameではなくclassを使用します。言語切り替え機能の追加
利用可能なロケールを読み取り、ユーザーが新しい言語を選択したときにローカライズされたURLに移動するPreactコンポーネント
LocaleSwitcherを作成します:src/components/preact/LocaleSwitcher.tsxコードをコピーコードをクリップボードにコピー
固定の維持に関する注意:
window.location.hrefを介したリダイレクトのためにonLocaleChangeを使用することで、新しい言語のURLが確実に訪問され、Intlayerミドルウェアが言語クッキーを設定して、将来の訪問時にユーザーの好みが記憶されるようになります。LocaleSwitcherはIntlayerProvider内でレンダリングされる必要があります。アイランドコンポーネント内で使用してください(ステップ6参照)。サイトマップとRobots.txt
Intlayerは、動的にローカライズされたサイトマップとrobots.txtファイルを生成するためのユーティリティを提供します。
サイトマップ
Intlayer には、アプリケーションのサイトマップを簡単に作成できるサイトマップ ジェネレーターが組み込まれています。ローカライズされたルートを処理し、検索エンジンに必要なメタデータを追加します。
Intlayer によって生成されたサイトマップは、
xhtml:link名前空間 (Hreflang XML Extensions) をサポートしています。生の URL のみを表示するデフォルトのサイトマップ ジェネレーターとは異なり、Intlayer はページのすべての言語バージョン (例:/about、/about?lang=fr、/about?lang=es) 間に必要な双方向リンクを自動的に作成します。これにより、検索エンジンが正しい言語バージョンを正しい対象者に正しくインデックス付けして提供できるようになります。すべてのローカライズされたルートを含むサイトマップを生成するために、
src/pages/sitemap.xml.tsを作成します。src/pages/sitemap.xml.tsコードをコピーコードをクリップボードにコピー
Robots.txt
検索エンジンのクロールを制御するために
src/pages/robots.txt.tsを作成します。src/pages/robots.txt.tsコードをコピーコードをクリップボードにコピー
Extract the content of your components
オプション既存のコードベースがある場合、何千ものファイルを手動で変換するのは時間がかかる作業になります。
このプロセスを簡素化するため、Intlayer はコンポーネントを変換してコンテンツを自動抽出する コンパイラー / エクストラクター を提供しています。
設定するには、
intlayer.config.tsファイルにcompilerセクションを追加します:intlayer.config.tsコードをコピーコードをクリップボードにコピー
import { type IntlayerConfig } from "intlayer"; const config: IntlayerConfig = { // ... Rest of your config compiler: { /** * Indicates if the compiler should be enabled. */ enabled: true, /** * Defines the output files path */ output: ({ fileName, extension }) => `./${fileName}${extension}`, /** * Indicates if the components should be saved after being transformed. * * - If `true`, the compiler will rewrite the component file in the disk. So the transformation will be permanent, and the compiler will skip the transformation for the next process. That way, the compiler can transform the app, and then it can be removed. * * - If `false`, the compiler will inject the `useIntlayer()` function call into the code in the build output only, and keep the base codebase intact. The transformation will be done only in memory. */ saveComponents: false, /** * Dictionary key prefix */ dictionaryKeyPrefix: "", }, }; export default config;Run the extractor to transform your components and extract the content
bashコードをコピーコードをクリップボードにコピー
アプリケーションをビルドしてコンポーネントを変換し、コンテンツを抽出します。
bashコードをコピーコードをクリップボードにコピー
TypeScriptの設定
Intlayerはモジュール拡張を使用してTypeScriptの利点を活かし、コードベースをより堅牢にします。

TypeScriptの設定に自動生成された型が含まれ、Preact用に設定されていることを確認してください:
コードをクリップボードにコピー
Gitの設定
Intlayerによって生成されたファイルを無視することをお勧めします。これにより、それらをGitリポジトリにコミットすることを避けることができます。
そのためには、.gitignoreファイルに以下の指示を追加してください:
コードをクリップボードにコピー
VS Code拡張機能
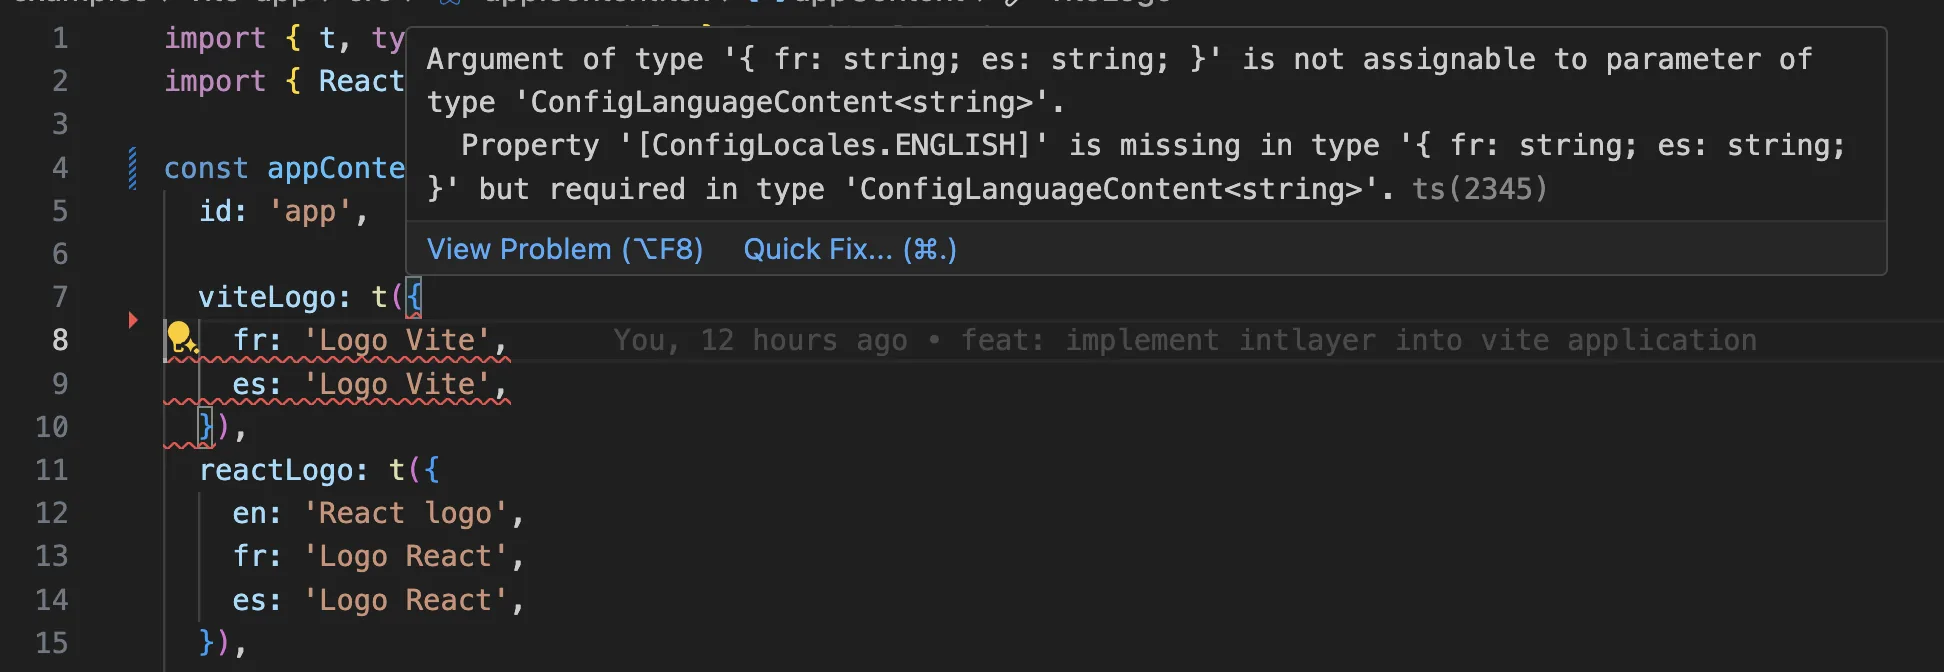
Intlayerを使用した開発体験を向上させるために、公式のIntlayer VS Code拡張機能をインストールできます。
この拡張機能は以下を提供します:
- 翻訳キーのオートコンプリート。
- 欠落している翻訳のリアルタイムエラー検出。
- 翻訳されたコンテンツのインラインプレビュー。
- 翻訳を簡単に作成・更新するためのクイックアクション。
拡張機能の使用方法の詳細については、Intlayer VS Code拡張機能のドキュメントを参照してください。
さらに詳しく
さらに詳しく知りたい場合は、ビジュアルエディターを実装したり、CMSを使用してコンテンツを外部化したりすることもできます。
よくある質問
Astro の組み込み i18n オプションはロケールプレフィックスとリダイレクトを処理しますが、コンテンツ自体は処理しないため、メッセージレイヤーが依然として必要です。さらに、island は Astro ではなく Preact で動作するという別の問題があります。
- Astro
i18nと手書きの辞書、そして island 内のpreact-i18n: 同期を保つべき2つのコンテンツソースがあり、それらの間に共有された型定義はありません。 Intlayer: 両方に対応する単一のコンテンツレイヤー。astro-intlayerは.astroページをカバーし、preact-intlayerは Preact island をカバーし、同じ宣言を読み取ります。
ラベルを一度宣言し、それを静的ページとインタラクティブな island の両方で使用できることが、ここで単一のコンテンツレイヤーを選択する理由です。Intlayer を選ぶ理由 を参照してください。
名前空間ベースのセットアップよりもはるかに少ないです。なぜなら、ページはレンダリングしないカタログをダウンロードしないからです。Astro ページはビルド時にレンダリングされるため、翻訳された HTML を出力し、辞書は一切含まれません。island のみが辞書を受け取ります。ビルド時コンパイラは、コンポーネントが使用する正確なエントリにコンテンツ呼び出しを解決し、動的辞書 は残りをロケールごとに分割します。通常の代替案と比較して、Intlayer は bundle およびページサイズを最大50%削減します。bundle の最適化 および ベンチマーク を参照してください。
ほとんど可能です。react-i18next から Intlayer への移行ガイド に従ってコンテンツを移行してください。段階的に移行することもできます。sync JSON plugin は、既存の JSON カタログを信頼できる情報源として保持し、それらから Intlayer 辞書を生成するため、コンポーネントを一つずつ移行する間も両方のレイヤーが同期を保ちます。
はい、可能です。sync JSON plugin は、/messages/{locale}/{namespace}.json ファイルを信頼できる情報源として保持し、双方向でそれらから Intlayer 辞書を生成します。sync PO plugin は gettext カタログに対しても同様の機能を提供し、ロケールごとのファイル を使用すると、複数のロケールを1つのファイルにまとめるのではなく、言語ごとにコンテンツを分割できます。
いいえ。npx intlayer extract を実行すると、Intlayer はコンポーネントを読み取り、ユーザー向けの文字列を抽出し、それぞれの隣に .content ファイルを書き込みます。これにより、文字列をカタログに一つずつコピーする代わりに、差分を確認できます。このガイドのステップ15でその手順を説明しています。
完全に自動化されたパイプラインの場合、Intlayer Compiler がビルド時に同じことを行います。変更があるたびに JSX、TSX、Vue、Svelte のソースをスキャンし、辞書を生成し、ホットモジュールリプレースメントを通じてそれらを同期させます。これにより、手動で管理するキーは一切なくなります。
コンパイラを有効にする前に知っておくべき2つの制限があります。これは静的解析によって機能するため、API エラーコードや CMS フィールドなど、実行時にのみ存在する文字列は対象外となります。また、className="active" やステータスコードのようなアプリケーションロジックと、ユーザー向けのテキストを区別する必要があり、大規模なコードベースではいくつかの注釈が必要になります。extract コマンド は、ユーザーが関与することでこれら両方を回避します。
5つのツールがあり、すべてオプションです。
- VS Code extension:
useIntlayerキーからそれを宣言するコンテンツファイルにジャンプしたり、コンポーネントからコンテンツを抽出したり、コマンドパレットまたは専用の Intlayer タブからビルド、fill、テスト、push、pull を実行したりできます。 - LSP server: LSP をサポートする任意のエディタで同様の認識機能を提供します。定義へのジャンプ、すべての参照の検索、翻訳された値のホバープレビュー、キーとフィールドのオートコンプリート、キーがどこにも宣言されていない場合の警告などがあります。また、
i18next、react-i18next、next-intl、use-intlの呼び出しも解決するため、移行中に役立ちます。 - MCP server: Intlayer のドキュメントと CLI を Cursor、VS Code、Claude Desktop、Claude Code、ChatGPT に公開します。これにより、アシスタントは推測ではなく現在のドキュメントから回答し、
intlayer fillなどのコマンド自体を実行できます。 - Agent skills:
intlayer-config、intlayer-cli、intlayer-contentなどの特化したスキルに加え、フレームワークごとのスキルがあり、エージェントにルーティング設定とコンテンツノードの型を教えます。 - ESLint plugin:
no-raw-textはハードコードされた文字列にフラグを立て、静的辞書キーや未使用のコンテンツに対する追加のルールも提供します。